Overview
Navigating an InfoPass appointment can feel overwhelming, but it doesn’t have to be. Here are three essential steps to help you through the process:
- Scheduling the appointment
- Preparing for the meeting
- Knowing what to expect during your visit
Understanding the scheduling process is crucial. Gather your necessary documents and maintain a calm demeanor; this will empower you to communicate your concerns effectively. Remember, you deserve support from immigration officials, and we’re here to fight for you every step of the way.
Introduction
Navigating the complexities of the immigration process can feel overwhelming, especially when trying to secure an in-person appointment with USCIS through the InfoPass system. This essential tool is designed to streamline communication for immigrants and ensure that specific concerns regarding residency status are addressed efficiently. Yet, many individuals find themselves lost in the scheduling process, uncertain of what to expect during their appointment.
Have you ever felt this way? How can you effectively prepare to make the most of this critical opportunity and ensure your voice is heard? Remember, you’re not alone in this fight.
Define InfoPass: Purpose and Importance in Immigration
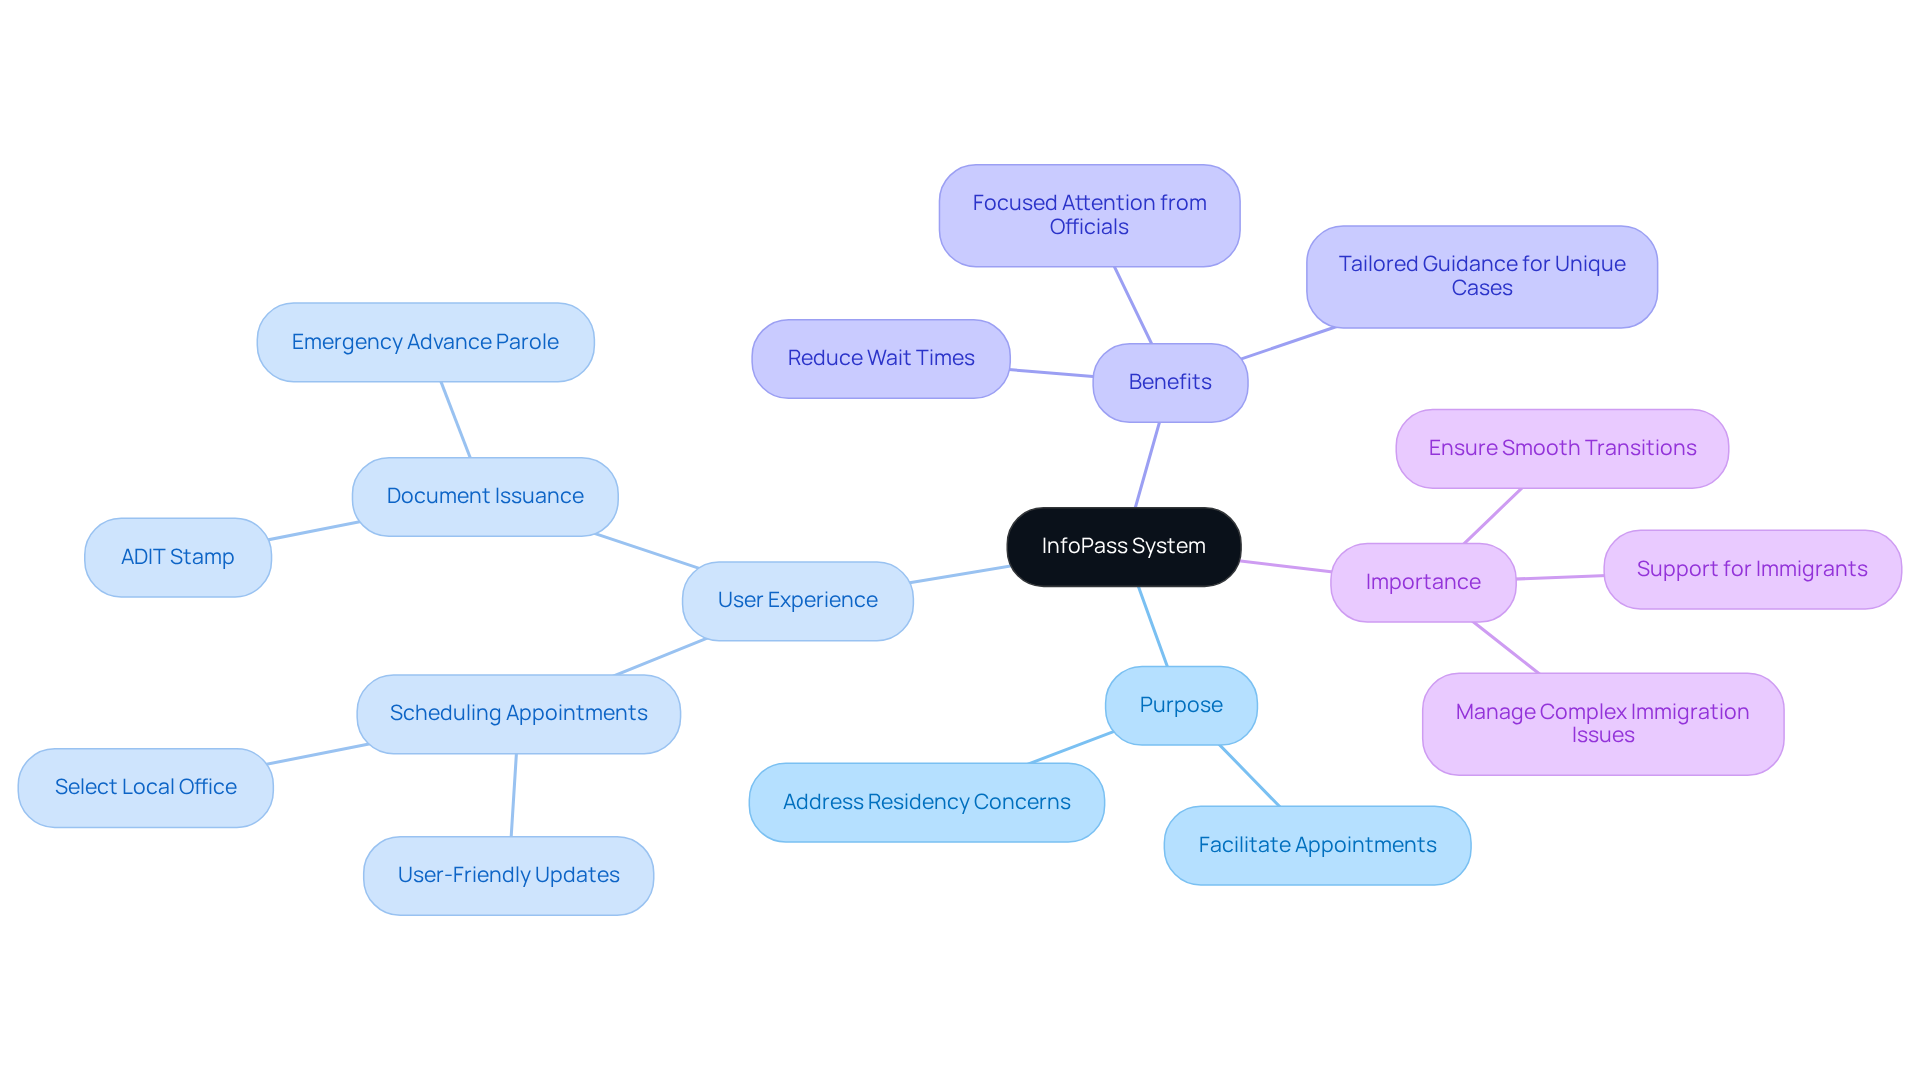
Navigating the online appointment scheduling system provided by the immigration agency can feel overwhelming, especially for newcomers. This system is designed to assist with in-person visits at local offices, aiming to improve communication with USCIS. It empowers individuals to address specific questions or concerns regarding their residency status, which is particularly vital for those needing to discuss sensitive issues like pending applications or requests for evidence. By utilizing this service, immigrants can significantly reduce wait times and ensure they receive focused attention from immigration officials.
Recent updates to the infopass system have made scheduling more user-friendly. Now, individuals can select their local USCIS office by entering their ZIP code and choose the type of appointment needed. This enhancement provides a more customized experience, effectively addressing distinct visa situations.
The importance of this system is underscored by its role in managing residency status. For example, those facing delays in their Employment Authorization Document (EAD) processing can directly address these issues during a scheduled meeting, leading to prompt resolutions. Furthermore, case studies illustrate how InfoPass meetings have effectively facilitated seamless transitions following favorable outcomes from judges, showcasing the system's capability in handling complex scenarios.
Statistics reveal that reservations can be made for various services, including ADIT Stamp issuance and Emergency Advance Parole documents, highlighting its flexibility in meeting urgent immigration needs. Additionally, the system allows users to print replacement visit notifications if they are misplaced, helping individuals stay organized and prepared for their meetings.
In summary, understanding how to navigate this system is crucial for anyone looking to manage their immigration journey effectively. As advocates in the field emphasize, scheduled meetings provide essential support for immigrants, ensuring their voices are heard and their concerns addressed swiftly. Remember, you are not alone in this fight—we're here to support you every step of the way.

Schedule Your InfoPass Appointment: A Step-by-Step Guide
Scheduling your infopass appointment is a crucial step in navigating the immigration process. Follow these steps to ensure you’re prepared:
-
Visit the InfoPass website to access the official InfoPass page, ensuring that you are on a legitimate site and avoiding scams. Your safety matters.
-
Select Your Language: Choose your preferred language for the appointment process. Effective communication is essential, and we want you to feel comfortable.
-
Click on 'Schedule an Appointment': This option will take you to the scheduling interface, where you can begin the process.
-
Enter Your Information: Fill in the required fields, including your name, date of birth, and zip code. This information helps the immigration service locate your records effectively.
-
Choose the Reason for Your Appointment: Select the appropriate reason for your visit from the dropdown menu. This helps USCIS prepare for your specific needs, whether it’s for an Alien Documentation, Identification and Telecommunication (ADIT) stamp or an Emergency Advance Parole (EAP).
-
Select a Date and Time: Review the available dates and times, and choose one that fits your schedule. Be mindful of any potential conflicts; your time is valuable.
-
Confirm Your Meeting: After choosing your date and time, review your information and verify the meeting. You will receive a confirmation number, which is crucial for your visit.
-
Print Your Confirmation: It’s advisable to print or save a digital copy of your scheduling confirmation for reference on the day of your visit. Having this handy will ease your mind.
By following these steps, you can efficiently arrange your visit with infopass and ensure you are well-prepared. This streamlined process enhances accessibility to immigration services, allowing you to manage your case effectively. Remember, you’re not alone in this; we’re here to fight for your family and support you every step of the way.

Prepare for Your InfoPass Appointment: What to Expect and Bring
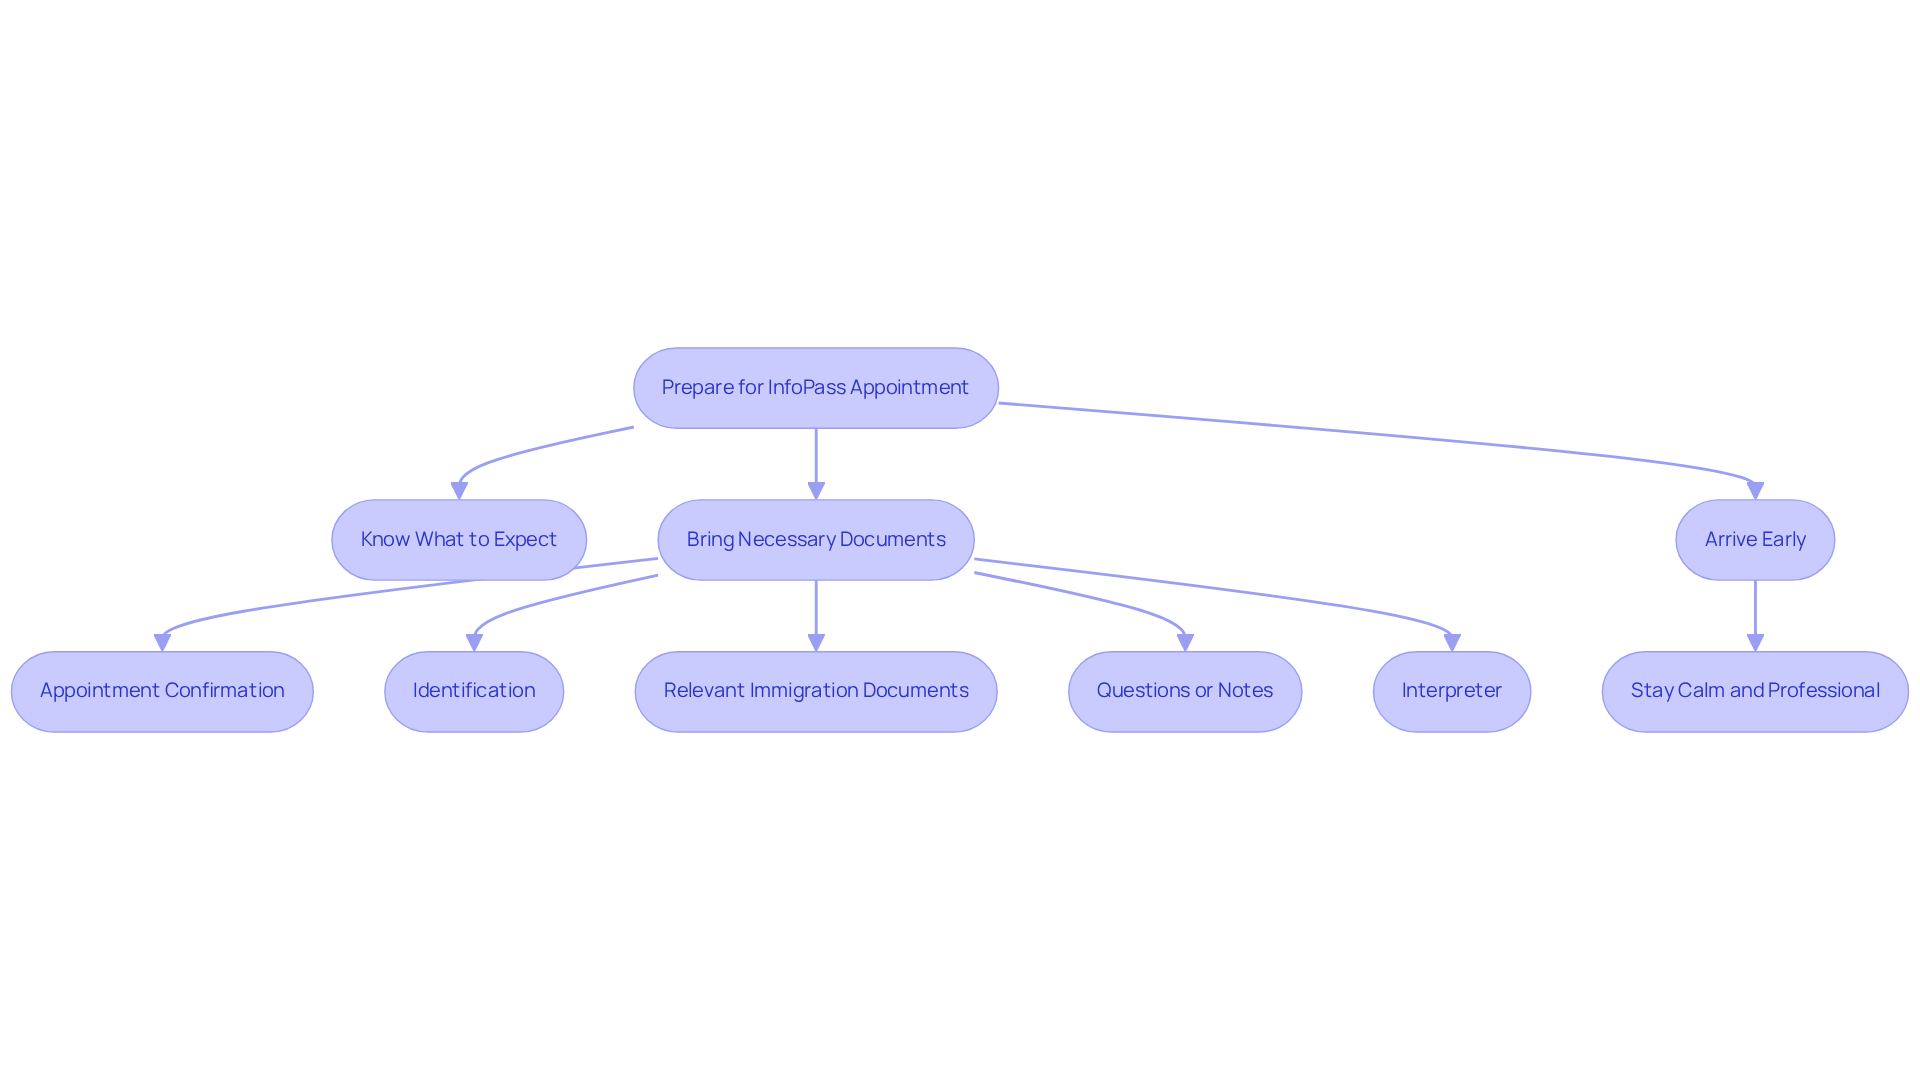
Preparing for your meeting is essential—knowing what to expect and gathering the necessary documents can make all the difference. Here’s how to get ready:
-
Know What to Expect: When you arrive, check in at the reception desk. Be ready for security checks and expect to wait until your name is called. The meeting can last from 30 minutes to an hour, depending on the complexity of your issue.
-
Bring Necessary Documents: Make sure you have the following items:
- Appointment Confirmation: A printed or digital copy of your InfoPass appointment confirmation.
- Identification: A government-issued ID, such as a passport or driver’s license.
- Relevant Immigration Documents: Bring any documents related to your case, such as application receipts, notices from USCIS, or any correspondence you have received. Additionally, consider bringing evidence like medical reports or employment letters to justify requests for faster processing.
- Questions or Notes: Prepare a list of questions or concerns you wish to address during your meeting.
- Interpreter: If English isn’t your strong suit, it’s wise to bring an interpreter to ensure clear communication.
-
Arrive Early: Aim to arrive at least 15 minutes before your scheduled meeting. This allows time for check-in and security procedures. Remember, arriving late could result in cancellation, requiring you to reschedule.
-
Stay Calm and Professional: Approach your meeting with a calm demeanor. USCIS staff are there to assist you, and showing respect can lead to a more productive conversation.
By adequately preparing for your infopass appointment, you can maximize the effectiveness of your visit and ensure that your concerns are addressed. We’re here to fight for your family—your future matters to us.

Conclusion
Navigating the InfoPass appointment system is a critical step for immigrants striving to address their residency status and immigration concerns effectively. This user-friendly platform streamlines the scheduling process and provides essential support, enabling individuals to connect directly with USCIS representatives who can assist in resolving specific issues.
Key insights from this guide emphasize:
- Understanding the scheduling process
- Preparing adequately for the appointment
- Knowing what to expect during the visit
By following the outlined steps—selecting the correct appointment type and gathering necessary documents—immigrants can significantly enhance their chances of a successful meeting. The focus on preparation and effective communication highlights the system's role in empowering individuals to navigate their immigration journey with confidence.
Ultimately, the InfoPass system serves as a vital tool for immigrants, ensuring their voices are heard and their concerns addressed promptly. Engaging with this service not only facilitates smoother interactions with immigration officials but also reinforces the notion that no one has to face these challenges alone. Taking action to schedule and prepare for an InfoPass appointment can profoundly impact the immigrant experience, paving the way for a more secure and informed future. Remember, we’re in this fight with you.
Frequently Asked Questions
What is InfoPass and what is its purpose?
InfoPass is an online appointment scheduling system provided by the immigration agency to assist individuals with in-person visits at local USCIS offices. Its purpose is to improve communication with USCIS and help individuals address specific questions or concerns regarding their residency status.
How does the InfoPass system help immigrants?
The InfoPass system helps immigrants by reducing wait times and ensuring they receive focused attention from immigration officials. It allows individuals to discuss sensitive issues, such as pending applications or requests for evidence, in a timely manner.
What recent updates have been made to the InfoPass system?
Recent updates have made the InfoPass system more user-friendly, allowing individuals to select their local USCIS office by entering their ZIP code and choose the type of appointment needed, providing a more customized experience.
Why is the InfoPass system important for managing residency status?
The InfoPass system is important for managing residency status as it allows individuals to directly address issues, such as delays in Employment Authorization Document (EAD) processing, during scheduled meetings, leading to prompt resolutions.
What types of services can be reserved through the InfoPass system?
Reservations can be made for various services through the InfoPass system, including ADIT Stamp issuance and Emergency Advance Parole documents, highlighting its flexibility in meeting urgent immigration needs.
Can users print replacement visit notifications through InfoPass?
Yes, the InfoPass system allows users to print replacement visit notifications if they are misplaced, helping individuals stay organized and prepared for their meetings.
Why is it crucial to understand how to navigate the InfoPass system?
Understanding how to navigate the InfoPass system is crucial for anyone looking to manage their immigration journey effectively, as it provides essential support for immigrants, ensuring their voices are heard and their concerns addressed swiftly.


